Building a MIPS Assembly Interpreter in Python
Building a MIPS interpreter from scratch with Python.


In my CCS 1B class (equivalent to UCSB's CS 64), we are learning about Assembly using the MIPS instruction set. Most of the "labs" are just homework questions about implementing simple programs or doing bit shifting by hand. As a CCS student, we get to do something a little more fun—we're building an entire Assembly interpreter from scratch!
GitHub repo here:
 ThePickleGawd
Getting Started
Prof. Balkind gave us the option to use any language we wanted. For me, that meant I'd either be writing this in C++ or Python. But obviously I chose Python since it's way easier.
We learned that CPUs follow a "fetch-decode-execute" cycle to process instructions. So I wanted to abstract all the functionality into a nice, clean loop.
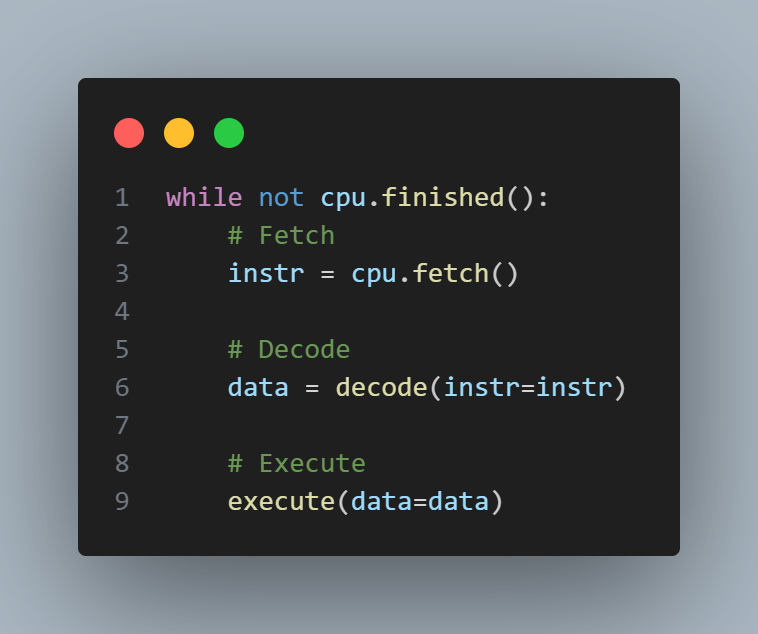
Now, I just have to build out each component, and I'll be done!
Decode
I started with decode since that was the most straightforward. Basically, the goal was to take an instruction represented in hex (for example: 0x014B4820), and parse it into something easier for me to work with. I decided to build my own Python type based on the MIPS reference card.
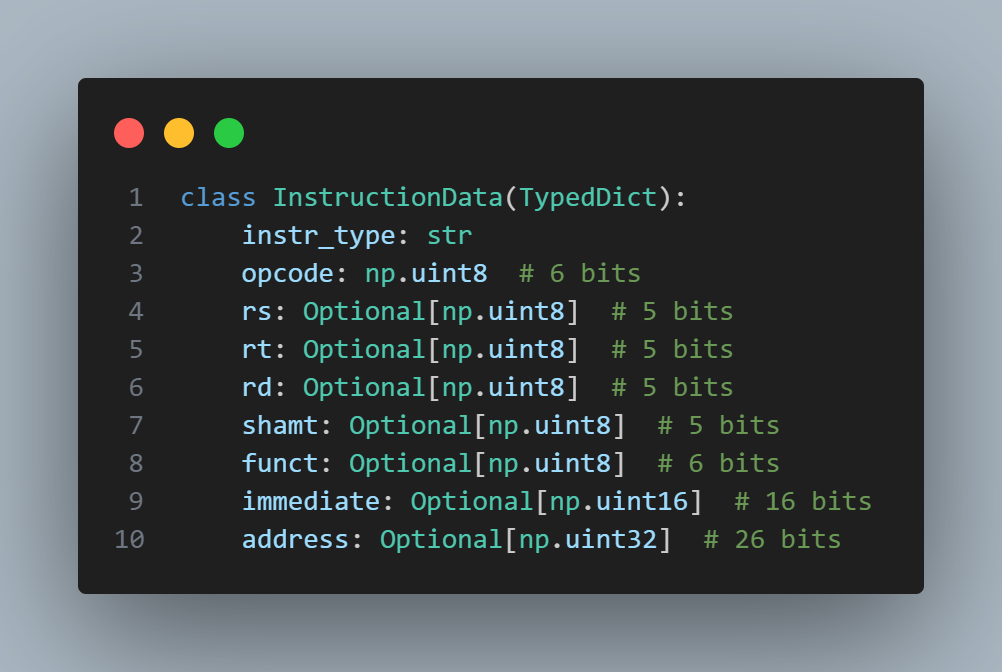
After some bit shifting and masking, I was able to construct the dictionary and return it.
Execute
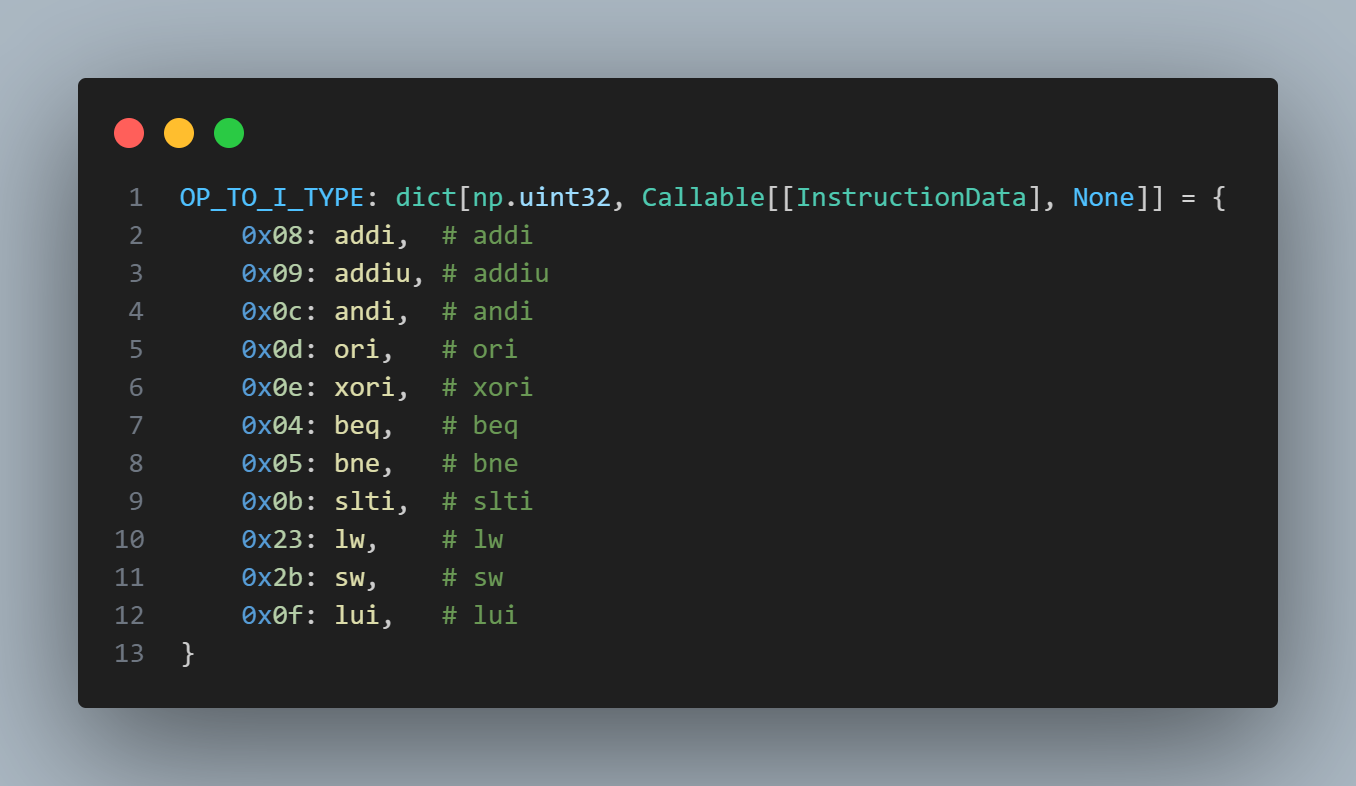
Now that we can easily understand each instruction, we need to tell our interpreter what to do when they see it. I started with a map from the opcode/funct parameter to the corresponding function definition. I made a dict for R, I, and J types.
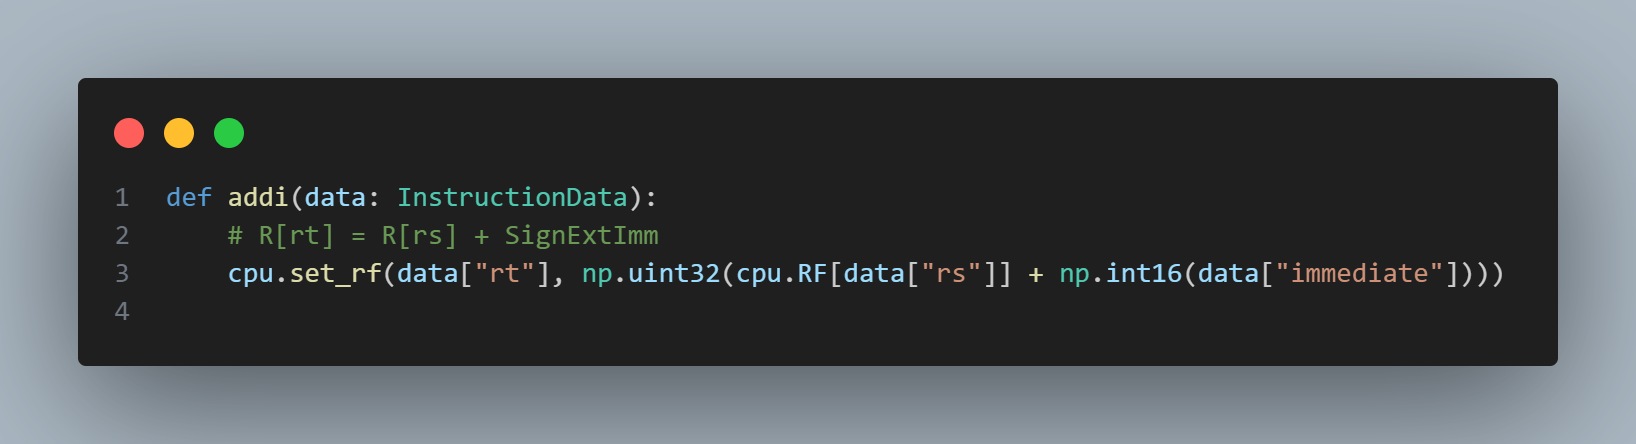
Then, I grinded out each function. For example, here's a very simple implementation of addi.
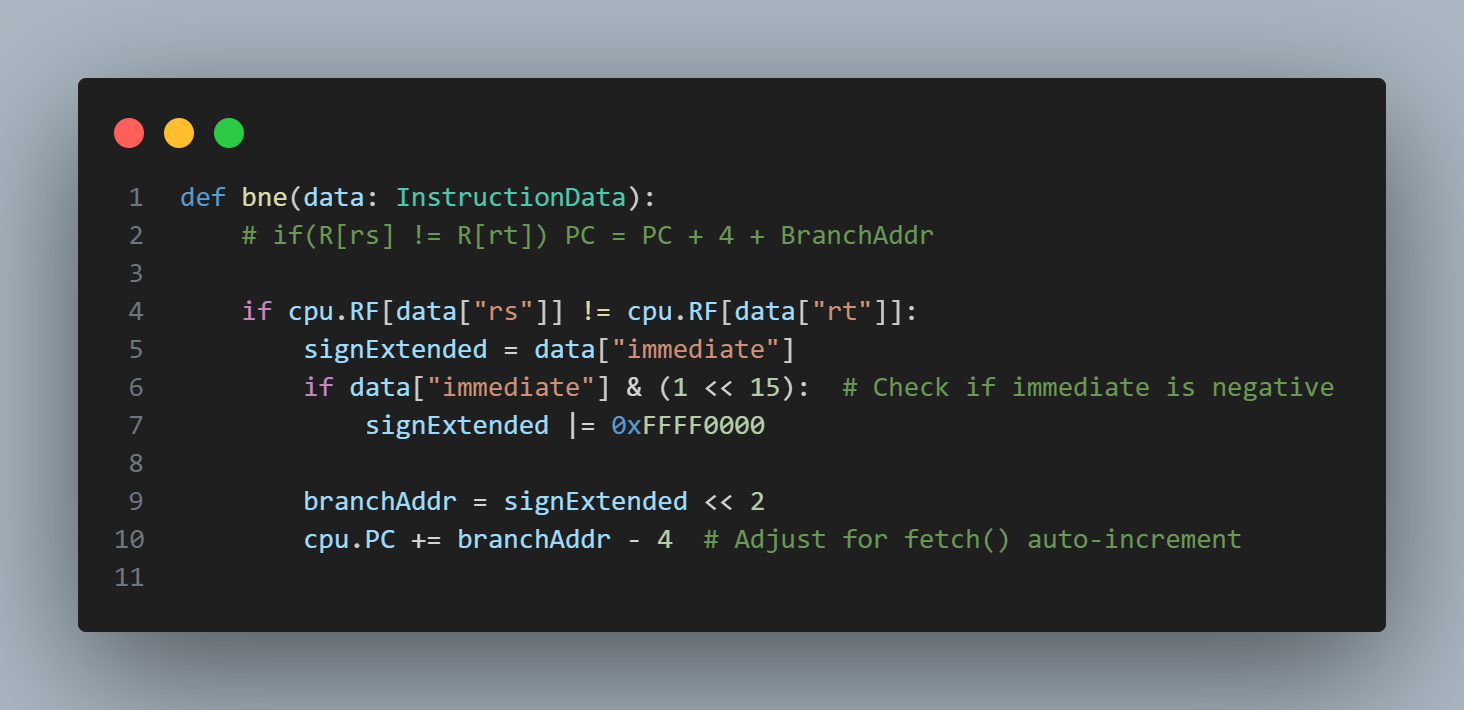
The most annoying part was implementing beq and bne. Everytime I fetch an instruction, I automatically increment the Program Counter, but MIPS reference card assumes that you don't increment it when you call beq/bne. I spent like 3 hours debugging this until I finally realized this. Ugh.
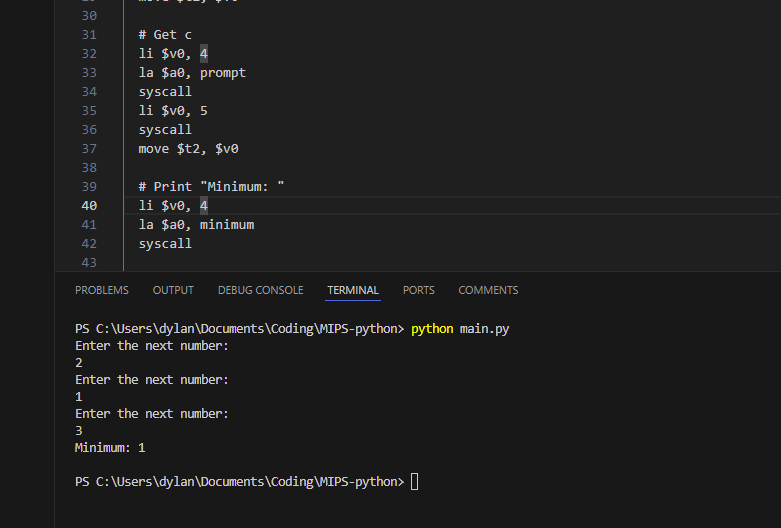
Writing syscall was also a little annoying because for some reason the data was in little endian format so I had read the hex bytes backwards, but then increment the memory address forward after reading each word.
Fetch
This part was pretty fun too. After running spim -assemble [file].asm, it gives you a binary with all the instructions and data in nice hex format. It looks somethign like this.
.text # 0x400024 .. 0x400044
.word 0x34080005, 0x34090007, 0x1285020, 0x34020001, 0x82021, 0xc, 0x3402000a, 0xc
.data # 0x10000000 .. 0x10010000
.word 0x0, 0x0, 0x0, 0x0, 0x0, 0x0, 0x0, 0x0, 0x0, 0x0, 0x0, 0x0, 0x0, 0x0, 0x0, 0x0, 0x0, 0x0, 0x0, 0x0, 0x0, 0x0, 0x0, 0x0, 0x0, 0x0, 0x0, 0x0, 0x0, 0x0, 0x0, 0x0, 0x0,
Using Python magic, I parsed it and loaded all the instructions and data into an array. Whenever I want to access the data/instruction from it's actual memory address, I just subtract the start offset (first hex value after #) and divide by 4 to get the index in my array. For example:
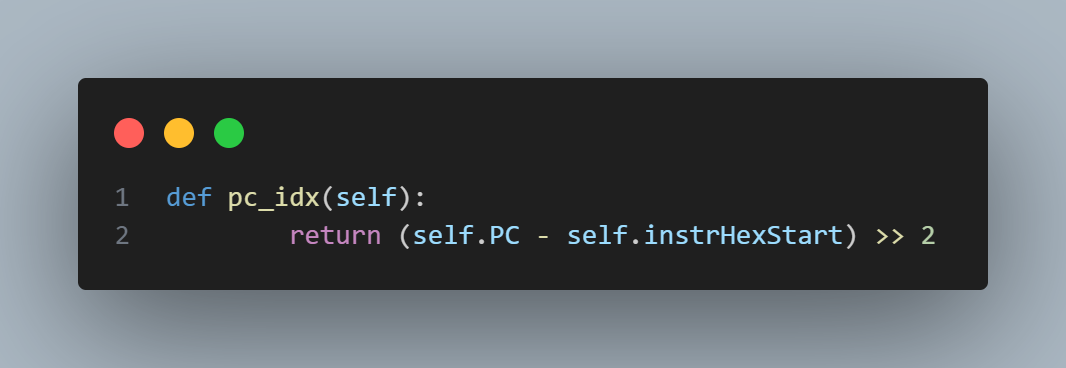
To fetch the next instruction, all we need to do it get the value in the array at pc_idx() and then increment PC += 4.
Conclusion
That's it! It was pretty fun building this interpreter. I think this was actually pretty similar to the Chip8 emulator tutorial that I never completed a few years ago. Anyways, lot's of cooler projects coming up, like a VR Duolingo game but it's a zombie outbreak and you have to talk in Chinese to survive.